

 Shopify
 S2S REST3DS2 – Authentication
 Available payment methods
 Available payment methods

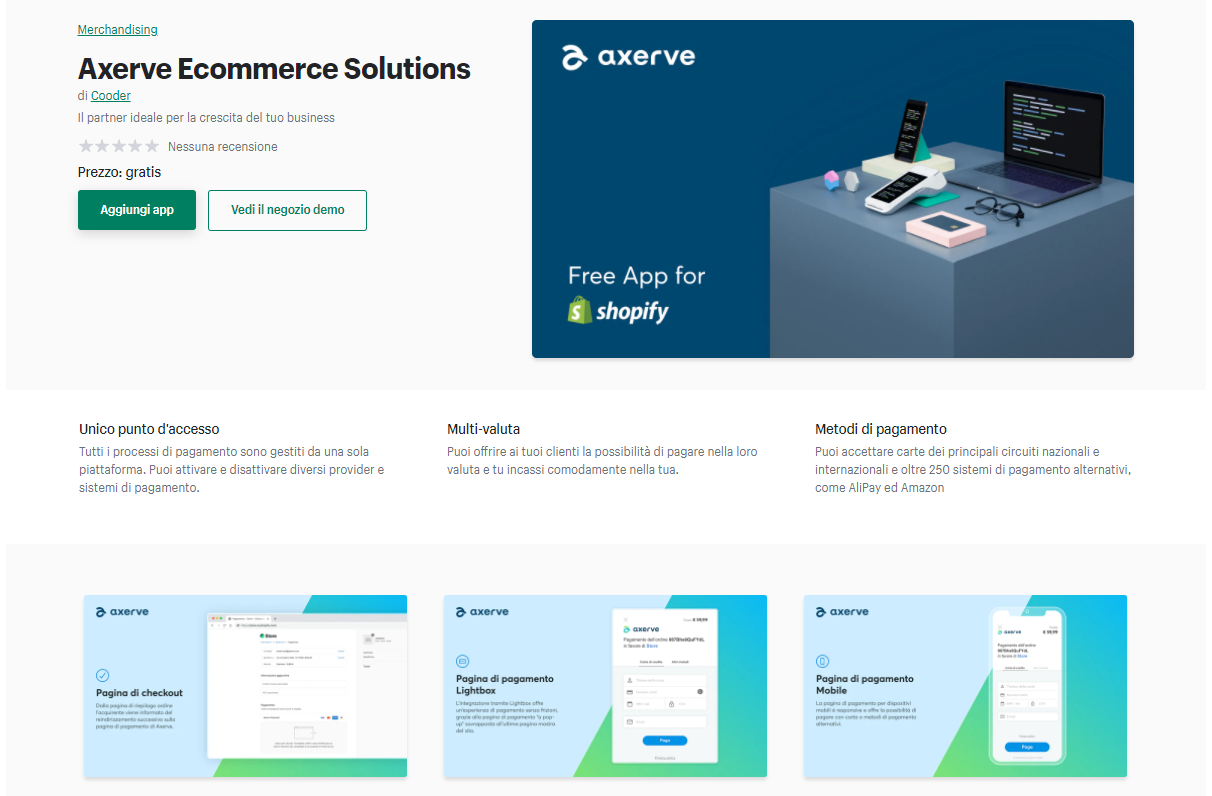
The integration of Fabrick Payment Orchestra on Shopify is offered as Application and allows you to use different payment methods.
The Fabrick application for Shopify allows you to pay through the Fabrick Payment Orchestra payment gateway, which gives you the ability to accept cards from the main national and international circuits and over 250 alternative systems. More than 1.7 million companies that rely on Shopify will have access to the payment methods offered by the partner (which are constantly updated), that the merchant had signed up with Fabrick.
The application provides a single settings panel for:
entering your "shop login" and "api key" that the merchant must have previously requested from Fabrick after activating a contract.
The management of multilingual and multicurrency options are handled automatically based on the parameters of the Shopify order and the settings in the portal.
Back Office Configuration (myCommerce dashboard)
At the following link you can request a Test Account to test the Plugin with the Fabrick Payment Orchestra payment gateway:
https://dashboard.gestpay.net/BackOffice/
Once you have created your test account, you need to communicate the Shoplogin, all payment methods and the functionalities you want to test via the technical support form  .
.
Creating the test account also allows you to continue with the next steps.
Perform the following steps in the application's Back Office:
Once logged in to your Fabrick Back Office, proceed to the menu Configuration > Security.
Click on “Security Level”.
Choose “APIKEY”.
Select “Add Key”.
Go to the menu “Security Level”.
Select the Checkbox “APIKEY”.
Shopify installation flow
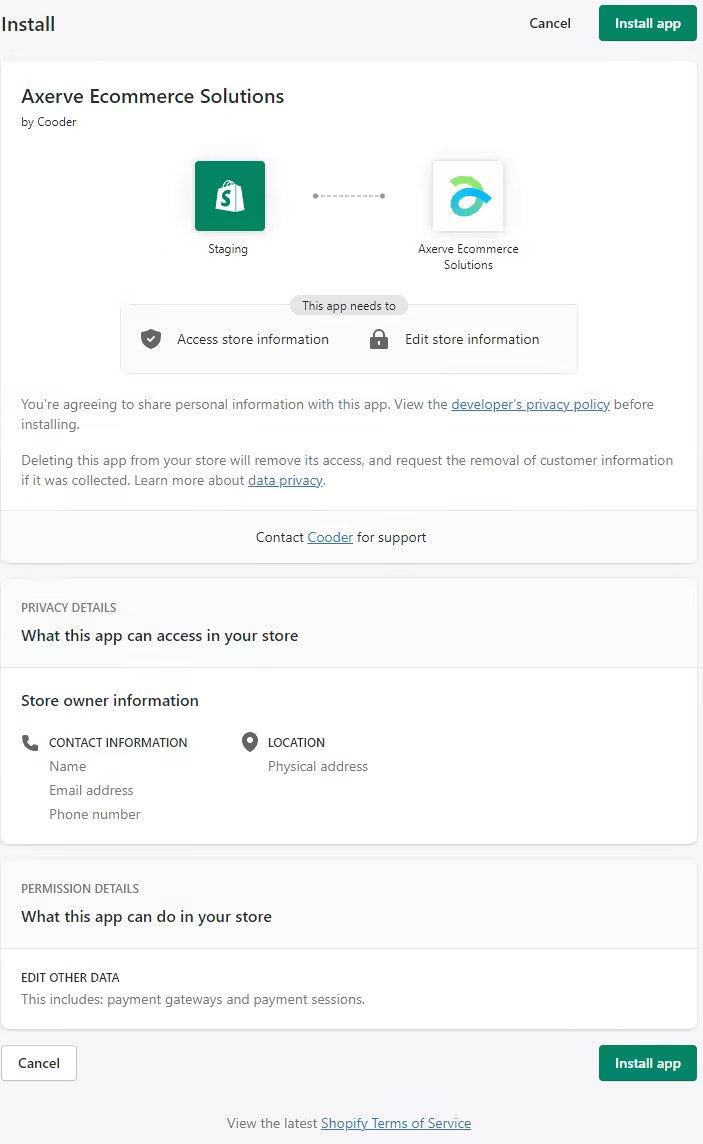
To activate the Application on their Shopify portal, merchants must proceed by following the standard procedure of installing the Application from this link.
1. How to install the payment
In this phase, the Application is installed and authenticated with the shop through the oAuth protocol (https://shopify.dev/apps/auth/oauth), by notifying the merchant of the data to which the Application has access, called "scopes":
The write_payment_gateways: reading and writing of the API for the configuration of the gateway settings
The write_payment_sessions: reading and writing related to the sessions on payments and returns
From this stage the Application obtains the accessToken in order to interact with the transactions created by the Ecommerce platform.
Steps to follow on the Shopify platform:
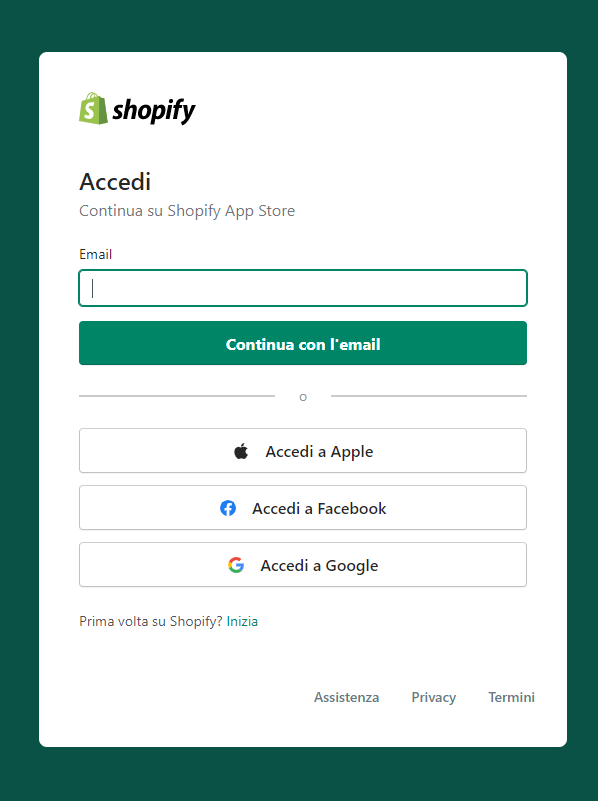
From the Application page click on the button “Add App”


You will be asked to access your store if you are not already connected:


Select from the list of shops, the shop on which to install the Application, or enter the url directly.


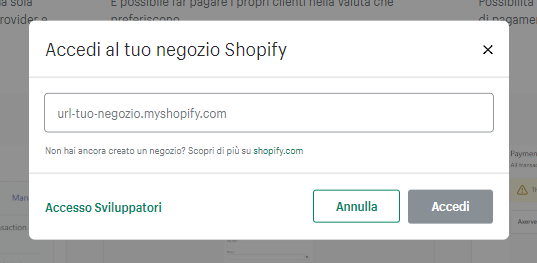
Complete the installation procedure on your shop, and confirm that you want to install the Application.


2. How to configure and activate the payment method
You need to configure the new payment method in order to activate it before making it available. As indicated in the configuration form, in this case it is necessary to have previously activated a contract with Fabrick in order to have an account with two fundamental parameters:
Shop Login (e.g. GESPAY12345)
Payment Api Key (e.g. YzejApM8AfnBzmvmMsMIp0y1V91aakQY…)


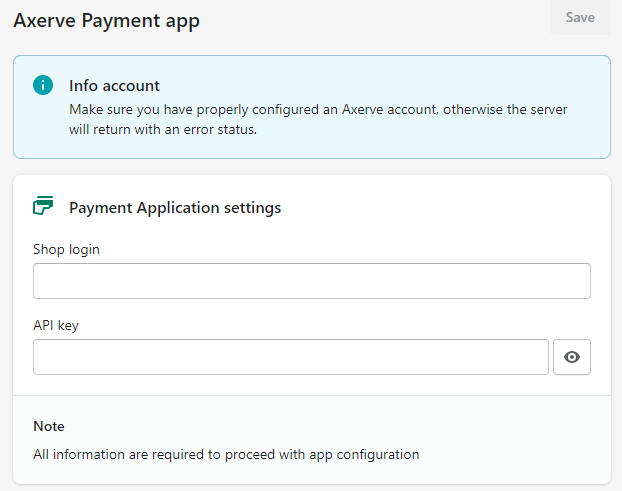
It is necessary to enter the data and save it in order to manage the payment method and see it in the section of Settings > Payment, to which you are redirected automatically. If the data is not saved, it is necessary to go through the installation phase again that is described in step 1.
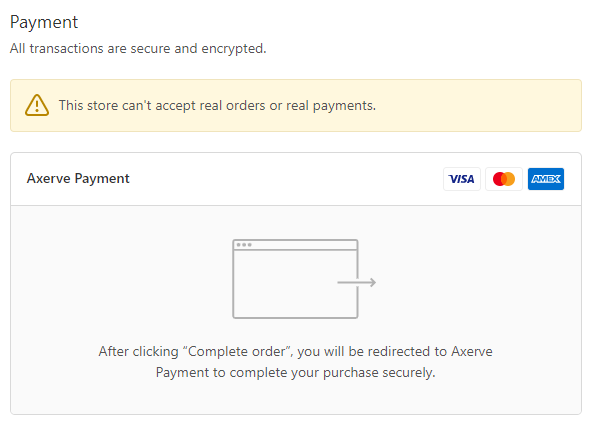
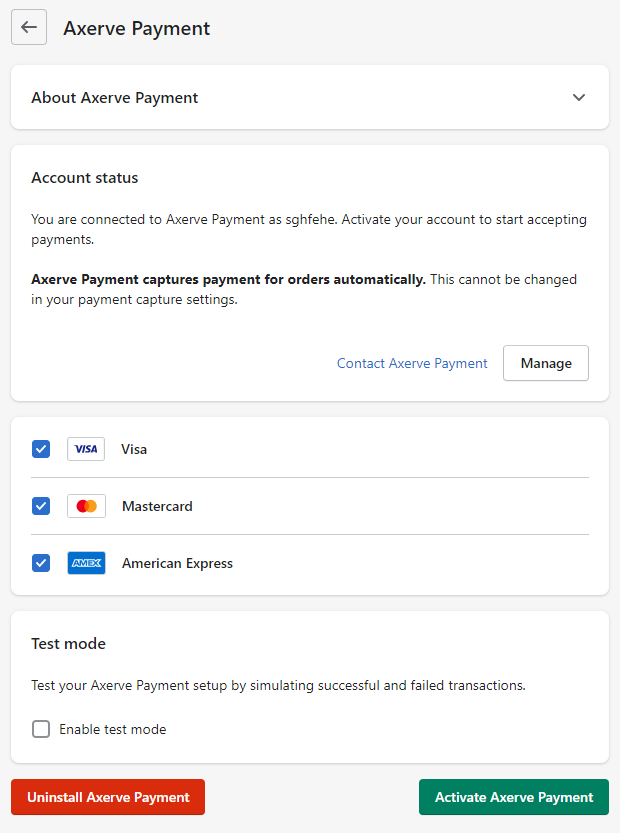
After configuring and saving the data, the payment method can be activated and from that moment it is also visible in the checkout flow.


After completing the installation and configuration steps, click on “Activate”.


3. How to deactivate a payment method
If you want to deactivate a payment method, you can do it from the Gateway Configuration Panel in Shopify. When the payment method is deactivated, it is removed from the list of available/enabled methods, but it is still possible to proceed with the returns of previously received orders.
Do not uninstall the Application. Once the Application is uninstalled, all operations on paid orders through that gateway, including returns, are disabled.
Choose the provider from the list in the section “Supported payment methods”,.
Click on “Manage”.
Click on “Deactivate“ to deactivate the provider.
Click on “Deactivate Payments App”.
4. Activating test mode on Shopify
After creating the test account on Fabrick and setting up Shopify, you only need to select the corresponding option to enable test mode.


5. Reconciling Shopify Orders with Fabrick
To reconcile orders between the Shopify backend and the Fabrick dashboard, keep in mind that the ShopTransactionID in the Fabrick dashboard corresponds to the Payment Reference on the Shopify order.