Set up the merchant profile
Fabrick Payment Orchestra is the online gateway that allows you to accept payments on any Ecommerce platform.
Fabrick Payment Orchestra can be integrated in three ways:
via a standard payment page
with a customized payment page according to your preferences
through the use of Server to Server requests.
Each merchant can configure their profile by accessing the Fabrick Back Office environment at:
https://ecomm.sella.it/backoffice
for production shops
https://sandbox.gestpay.net/backoffice
for test shops
Authentication
Fabrick Payment Orchestra supports two ways to authenticate incoming calls: via IP and via ApiKey.
Authenticating via IP means that you register the server's IP address on Fabrick Payment Orchestra and that it will reject any calls that come from unknown IP addresses.
This approach can work most of the time, but as cloud hosting grows, it can be difficult to always have the same public IP: server traffic can come from a variety of IPs.
If this is the case, Fabrick has introduced ApiKey authentication: you only need to generate an Apikey token via the Fabrick Back Office (Fabrick dashboard) and use it for each call.
The first step is to choose which authentication you need:
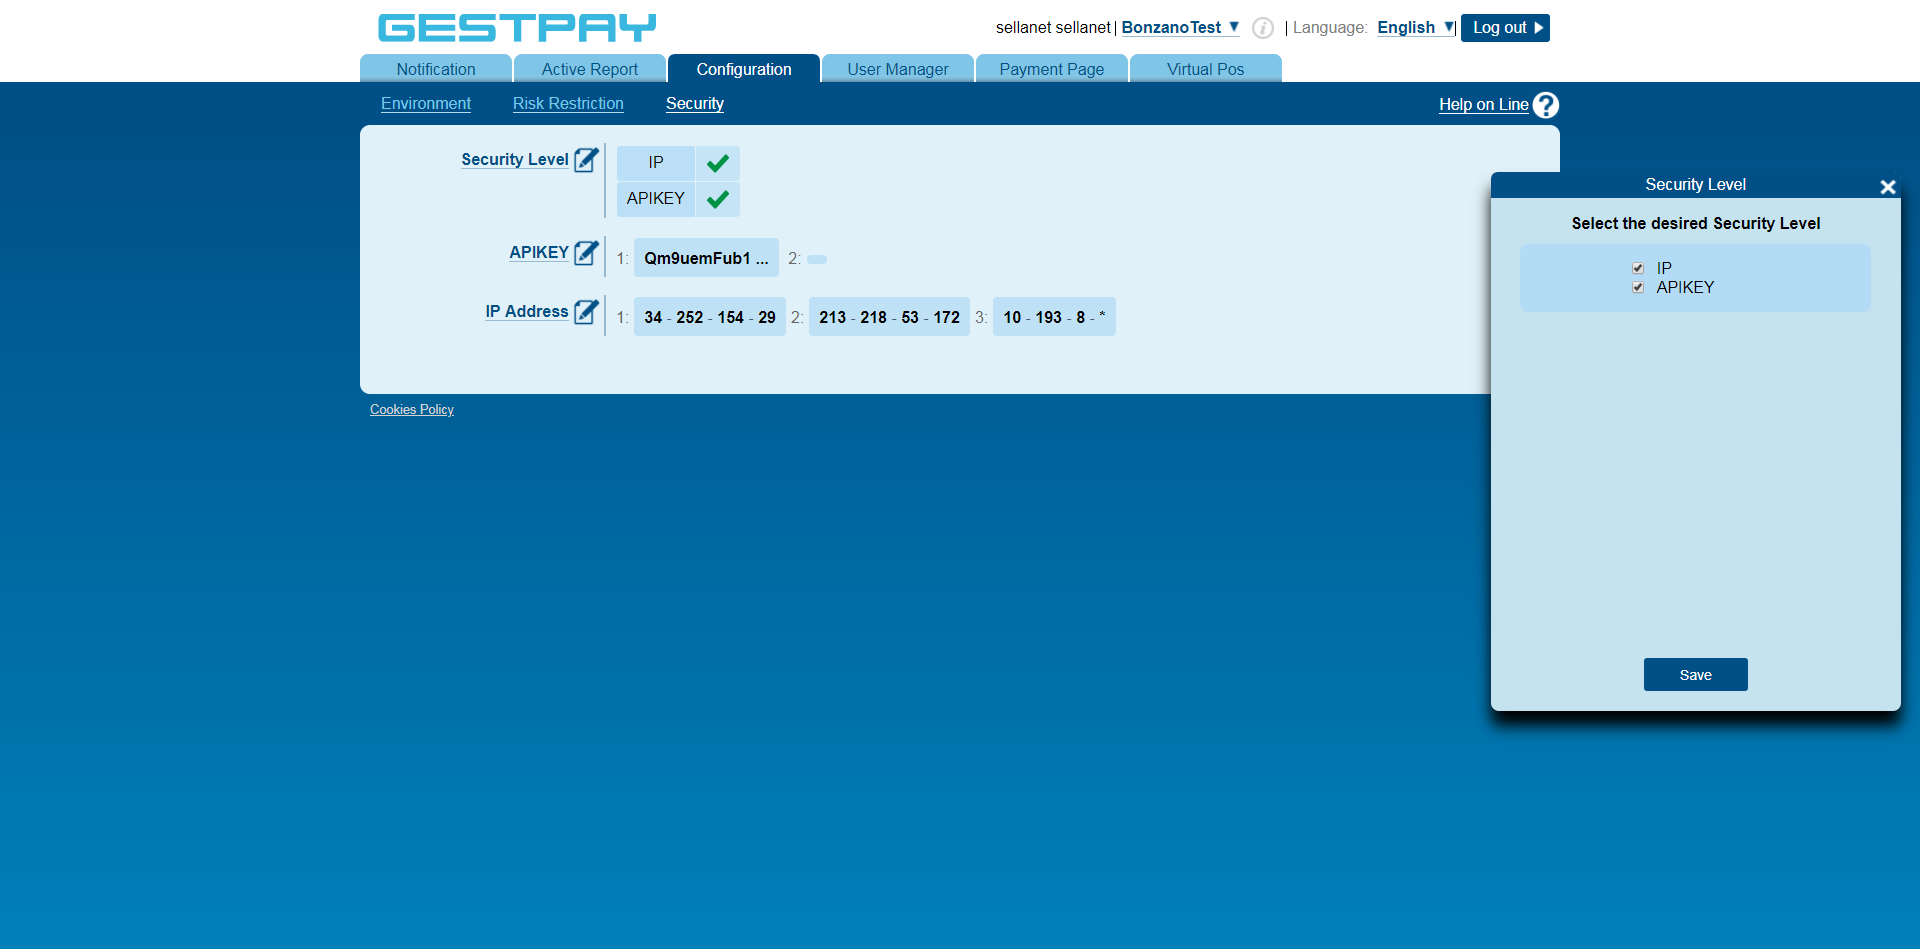
The two authentication systems can be used together or independently, the important thing is that at least one is chosen. Let's look at them together in detail.
Authenticate via IP
Fabrick Payment Orchestra identifies the merchant requesting the encryption service by comparing the IP address of the server making the call with the IP addresses configured in the profile associated with the Shop Login used for the call. If the calling server is not recognized, the transaction process ends and a specific error is returned.
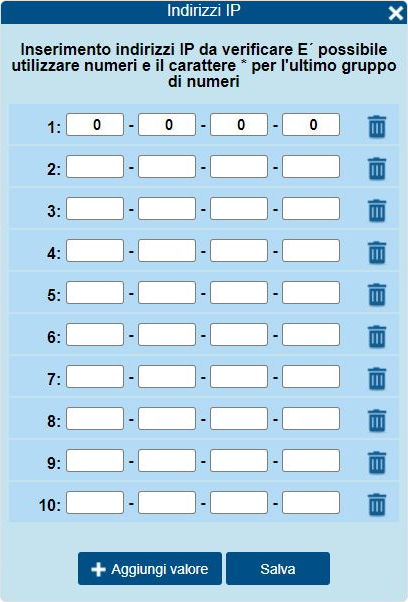
In the Configuration > Security > IP Address of the Back Office, the merchant can enter the IP addresses of his servers. There is no limit to the number of IPs that can be entered.
Authenticate via ApiKey
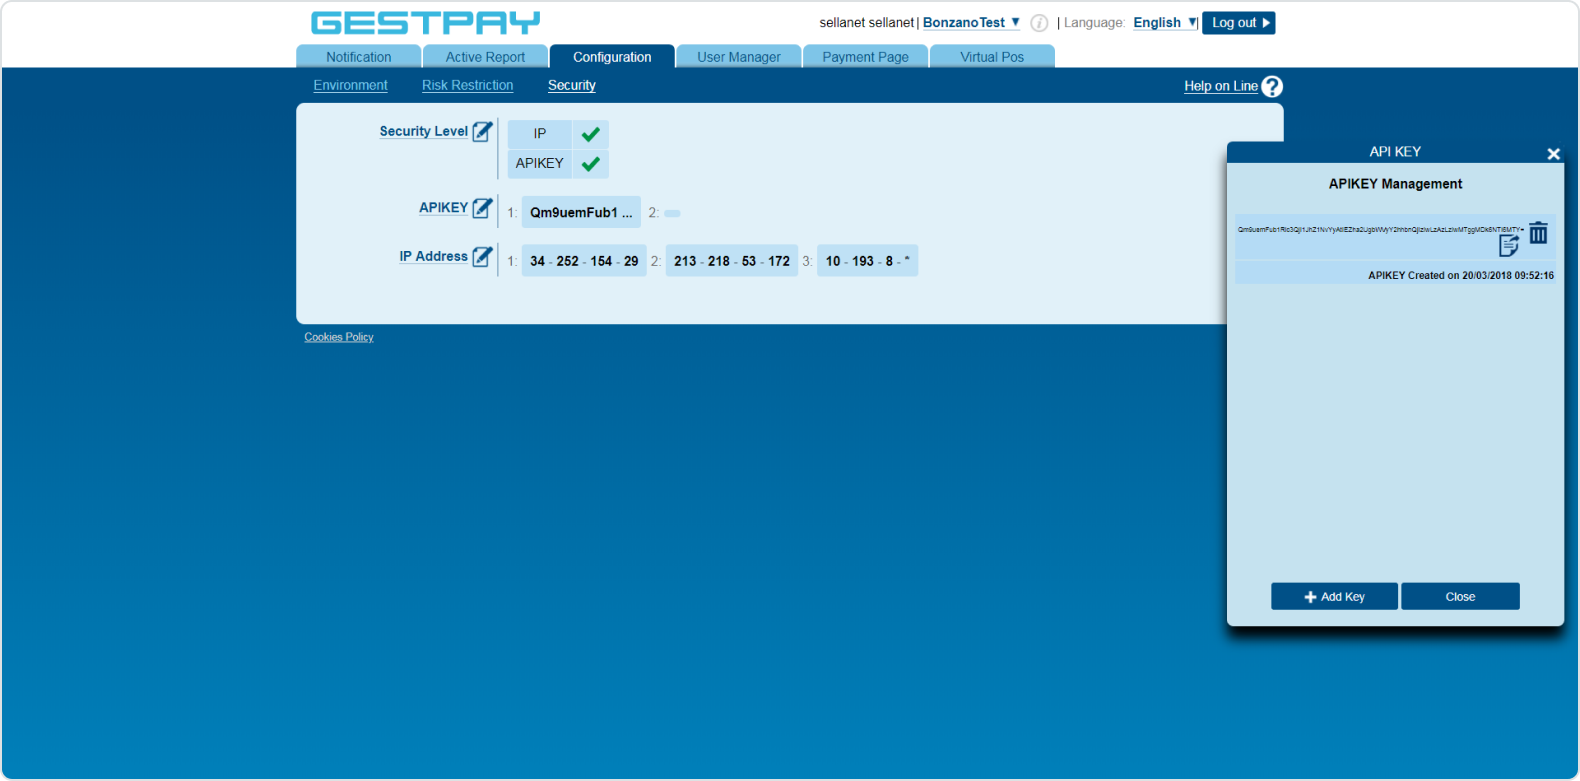
If you can't use the server's public IP, you can authenticate with an ApiKey generated by Fabrick. It is a single random sequence that must be kept secret.
Anyone who knows the APIKey can pretend to be the merchant in the eyes of Fabrick Payment Orchestra. This is why it is important to keep the APIKey safe and not share it with anyone.
The token must be attached to on every call to Fabrick. For example, in the case of:
1<Encrypt>
2  <shopLogin>GESPAY12345</shopLogin>
3
4  <!-- Use the apiKey as a field of your call -->
5  <apikey>YZejApM8AfnBzmvmMsMIp0y1V91aakQY....</apikey>
6
7  <!-- all other fields, as usual -->
8  <uicCode>242</uicCode>
9  <amount>1245.6</amount>
10  <shopTransactionId>34az85ord19</shopTransactionId>
11  ...
12</Encrypt>
For more information on how to generate and manage the apikey, refer to the online support available on each page.
Configuring URLs and response e-mails
Fabrick Payment Orchestra communicates the result of the transaction with a server-to-server call prepared specifically by the merchant that directs the buyer's browser to the configured pages (different pages for positive or negative results).
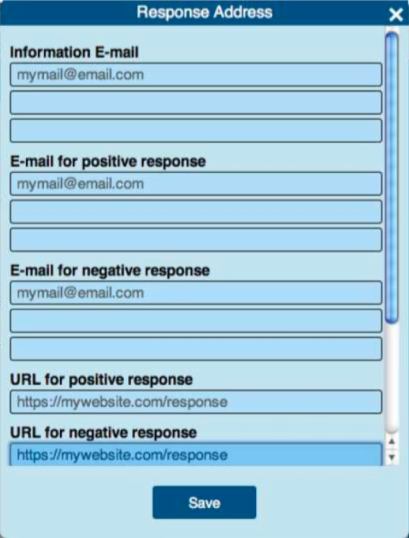
In the Configuration > Environment > Response Address section of the Back Office it is possible to specify the URLs used by the system to communicate the result of the transaction.
In this section you can also specify the addresses that will be used for e-mail notifications.
Below some more details about the URLs.
URL for positive response: when the payment is complete and successful, Fabrick Payment Orchestra redirects the user to this URL with two parameters: a containing the Shop Login, and b with an encrypted sequence containing the payment data. The merchant must set up a page that decodes the encrypted sequence and shows the result of the payment to the user.
URL for negative response: This setting behaves exactly like the previous one, but is used when the payment is declined.
Server to Server URL: Fabrick Payment Orchestra calls this URL to notify the payment result. This happens asynchronously and independently of the two previous settings. The parameters will again be a containing the Shop Login and b containing the encrypted sequence. The merchant's server must decode the strip to retrieve useful information on the transaction. The decrypted information can be saved and used by the merchant. In this way, the merchant has an independent way to update the status of the transaction, even if the user diversion fails.
If the Server to Server URL is not defined, Fabrick Payment Orchestra sends its notifications to the URL specified for the buyer redirect (URL for positive response or URL for negative response) based on the result of the transaction. Fabrick Payment Orchestra uses server-to-server communication mainly to confirm the status of the transaction to the merchant's server, even if the user diversion is unsuccessful. Fabrick Payment Orchestra will try to contact the merchant's server twice a day for 48 hours, until the merchant's server responds with a status code of 200. After 48 hours, the merchant will receive an email with notification of failure.
The status of the transaction can be OK, KO, XX.
XX means that the transaction status is pending, and a subsequent server-to-server call will return the final response, OK or KO
MOTO: what happens after a transaction
MOTO - stands for Mail Order - Telephone Order. Long before the internet, the only way to pay without showing a credit card was by phone or by post.
In Fabrick Payment Orchestra, MOTO means that a transaction is performed without physically handling the credit card.
MOTO indicates how the system should behave when receiving transactions. There are two options:
Unifying authorization and transaction. When the buyer completes the payment, the money is automatically transferred to the merchant's account.
Separation of authorization and transaction process. In this case, when the buyer completes the payment, Fabrick Payment Orchestra asks the issuer of the credit card only to authorize the payment (ie, they verify that the money is available and block it); later the merchant will have to complete the transaction.
If the transaction is not completed in 25 days (configurable), Fabrick Payment Orchestra automatically cancels the transaction and the money is returned to the buyer. 25 days is the maximum number of days the transaction can be authorized before being canceled.
The MOTO are valid for all credit card transactions, including ApplePay, Hype, or token transactions.
The MOTO transactions are valid with every Fabrick Payment Orchestra plan. The settings will be used to determine the next transaction status, whether using Fabrick's payment page, iFrame solution or server-to-server calls.
Configuring fields and parameters
The merchant may want to choose whether to show some fields on the payment page or in the response emails, based on their needs, for example the email or the name of the buyer. In Payment Page > Fields&Parameters you can decide which parameters to show and when.

Sending custom parameters to Fabrick Payment Orchestra
User-defined parameters can also be passed during the Encrypt call. It is completely optional and it can be useful to attach some additional information (sessionId, a variable, etc.) that you want to receive when the payment is completed (or rejected).
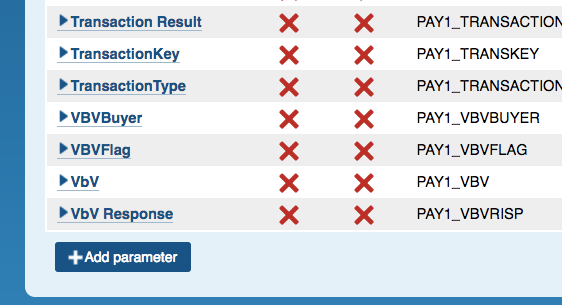
From the Payment Page > Fields&Parameters page, create the custom parameter by clicking on Add parameter in the merchant's Back Office:
Then fill in the box with the name of the parameter:
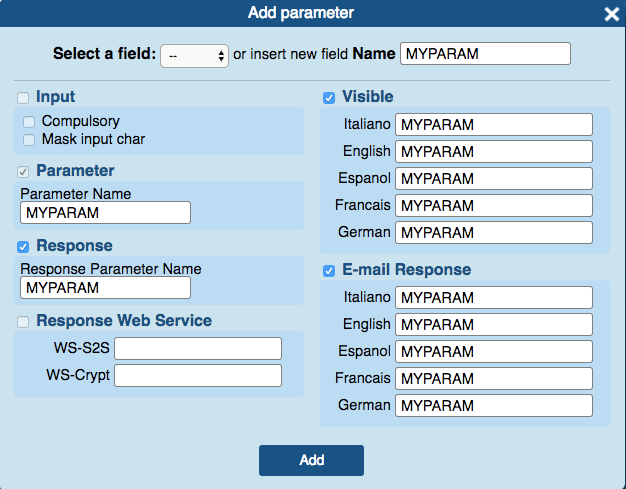
A description of the fields:
Field Name: the parameter name that will show up in the Mechant Back-Office, under Payment Page > Fields&Parameters.
Parameter: the parameter name that will be used via the WsCryptEncrypt code in payment/details and other methods.
Response: the name that the parameter should have in response.
Visible: if the parameter should be shown to the buyer on the payment page, click this button. You can choose a name for the parameter in all Fabrick Payment Orchestra supported languages.
Email Response: if the parameter should be sent to the buyer via mail, here you can specify the name of the parameter in all Fabrick Payment Orchestra supported languages.
Once you have set up a new parameter (in the examples the parameter is called MYPARAM) you can send it via the web service Encrypt method.
Custom parameters can be encoded in the customInfo field, paying attention to the syntax:
customInfo contains a maximum of 100 characters
each single parameter can have a maximum of 300 characters
the following special characters cannot be used in parameters: & (space) § () \ * <>,; : \ * P1 \ * / []? = - / \ *% // ~
The parameters must be coded like this:
<customInfo> datum1 = value1 \ * P1 \ * datum2 = value2 \ * P1 \ * ... \ * P1 \ * datumN = valueN </customInfo>
Formally, it is a sequence containing key = value pairs separated by the special sequence * P1 *.
Here is an example of customInfo:
<customInfo> BV_CODCLIENTE = 12 * P1 * BV_SESSIONID = 398 </customInfo>
Once the Encrypt request has been received and the payment processed, the Decrypt result
will contain the same parameters in another customInfo field.
For more information on customInfo , consult the API.
Each merchant can configure their profile by accessing the Fabrick Back Office environment at:
https://ecomm.sella.it/backoffice
for production shops
https://sandbox.gestpay.net/backoffice
for test shops
Authentication
The Rest API introduces authentication using ApiKey, a casual token generated by the Fabrick Payment Orchestra back office to be used in every call. This methodology was introduced to deal with the increasingly common cloud hosting, on which it is difficult to always have the same IP.
First of all, you need to create and activate the ApiKey within the back office.

By choosing the API Rest it is possible to authenticate exclusively via ApiKey, for this reason it is necessary to insert the flag as shown in the image below.
Anyone who is aware of the APIKey can send payment requests in the name of the merchant. It is of fundamental importance to keep the ApiKey safe and not to communicate it to anyone.
The token must be inserted as a header at each Fabrick Payment Orchestra call.
Authorization:apikey R0VTUEFZNjU5ODcjI0VzZXJjZW50ZSBUZX....
For more information on how to generate and manage the ApyKey string, you can refer to the Online Support available in the Configuration - Security section of the back office.
Alternatively, once the payment has been created, you can use the payment token.
Configuring URLs and response e-mails
Fabrick Payment Orchestra communicates the result of the transaction with a server-to-server call prepared specifically by the merchant that directs the buyer's browser to the configured pages (different pages for positive or negative results).
In the Configuration > Environment section of the Back Office it is possible to specify the URLs used by the system to communicate the result of the transaction.
In this section you can also specify the addresses that will be used for e-mail notifications.
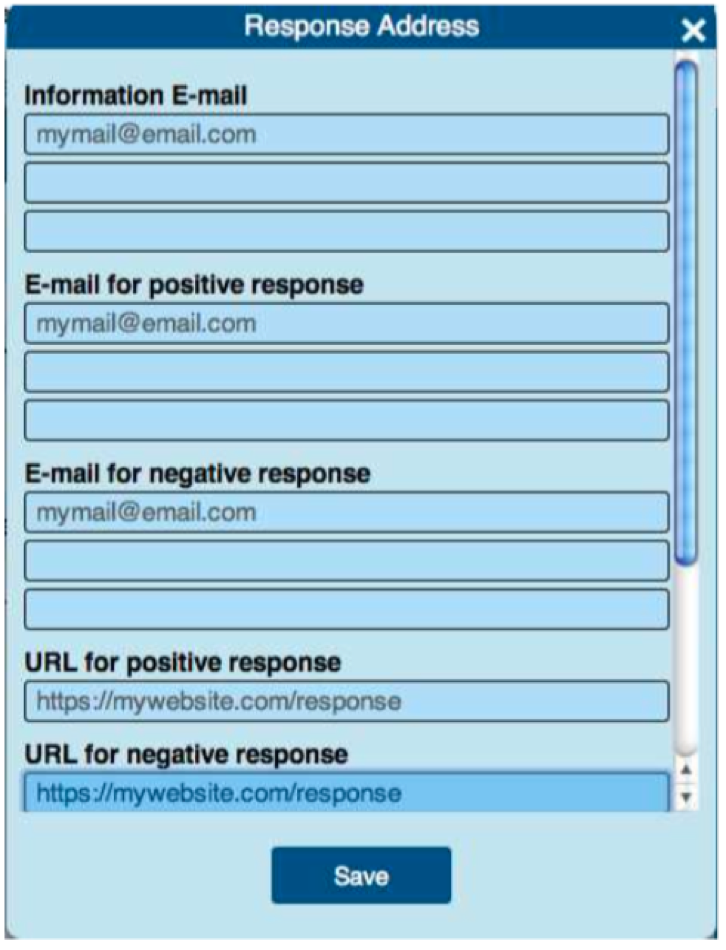
The required URLs are:
URL for success: when the payment is accepted.
URL for failure: when the payment is denied.
Server to Server URL: server to server call, the response is sent in both cases (positive and negative)
In all payments, Fabrick Payment Orchestra adds these parameters to the URL:
a: Shop login
status: OK (if accepted) or KO (if denied)
paymentID
paymentToken
It is also possible to override these URLs when calling payment/submit , in the responseURLs object (read the documentation about it to learn more)
The status of the transactions can be:
UNSUBMITTED The transaction was created but not sent
WAITING The payment has been sent and Fabrick Payment Orchestra is awaiting an event (eg. 3DS authentication of the buyer or a third-party redirect) in order to send the authorization request
PENDING (XX) The authorization request has been sent and Fabrick Payment Orchestra is awaiting a response from a third party
APPROVED (OK) Request approved
DECLINED (KO) Request denied
MOTO: what happens after a transaction
The MOTO (Mail Order - Telephone Order) takes place without the physical presence of the card, subject to the buyer's payment order by telephone, e-mail or fax.
Within the dashboard, in the Configuration > Environment section, MOTO identifies the two payment management methods:
Authorization and financial confirmation / capture happen at the same time. When you want the payment authorization and capture to take place simultaneously on the payment tool.
Separation between authorization and financial confirmation / capture. The financial confirmation, subsequent to the authorization request, takes place at a later time (for example, once the availability of the goods in the warehouse has been verified).
In the second case, it is possible to customize the operation by choosing between delete and settle and selecting how many days after the authorization date it should take place (for example, 14 days for Klarna Payments, 25 days for other alternative payment methods).
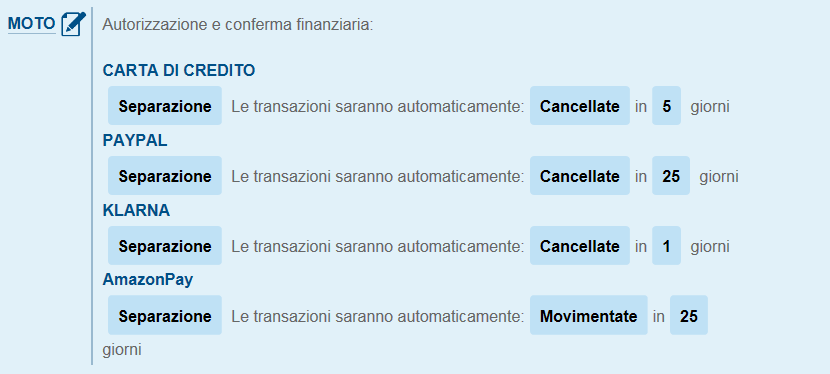
If the transaction is not captured within 25 days (maximum timing), the gateway automatically cancels the transaction, releasing the sum on the customer's card.
MOTO settings are valid for all credit card transactions and main digital wallets (eg Apple Pay, PayPal, Amazon Pay) and available for all Fabrick Payment Orchestra configurations (standard payment page, customised iFrame or server-to-server).
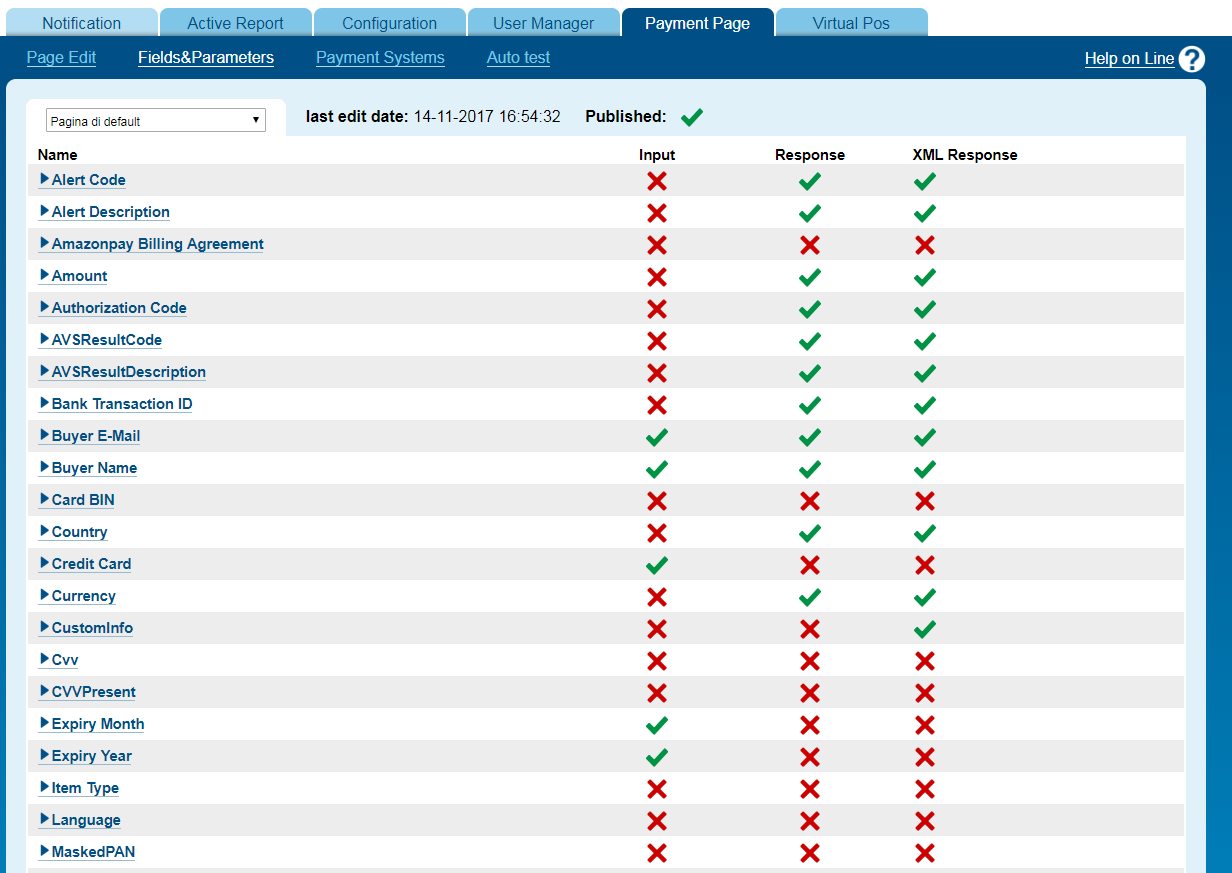
Configuring fields and parameters
The gateway allowa you to customize the payment page and the e-mails sent to the buyer by showing or hiding some fields.
Within the Payment Page > Fields&Parameters you can apply customizations according to your needs.
Sending custom parameters to Fabrick Payment Orchestra
Some custom parameters can be defined during the creation of the payment / create call. You are given the option to enter variables such as the customer code, an order number or the invoice number, in general data that you want to be associated with the payment and which will also be returned in the responses to calls.
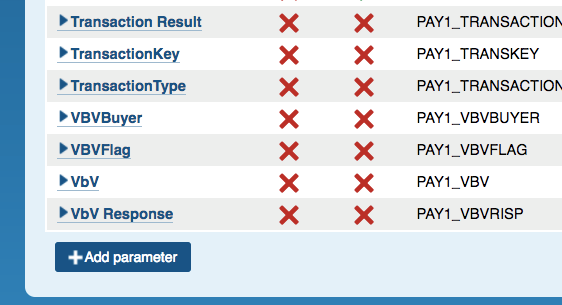
From the Payment Page > Fields&Parameters section, simply click on Add Parameter:
And fill in the fields that appear in the popup:
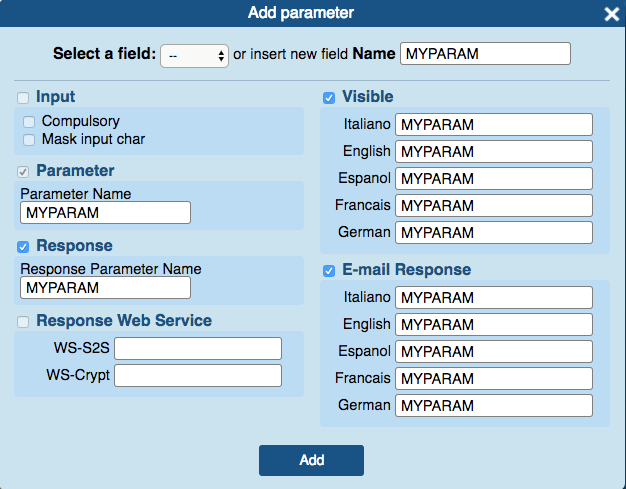
The available fields are:
Field Name: the name assigned to the parameter that will be shown in the back office in the Payment Page > Fields&Parameters.
Parameter: the name of the parameter used in payment/details and other methods.
Response: the name that the parameter should have in responses to the call.
Visible: insert the flag if the parameter must be shown on the payment page. You can choose a different name for each available language.
Email Response: name of the parameter to be shown in the event that it is data to be sent by e-mail to the buyer, also in this case it may vary according to the language.
Once a parameter has been created, it can be sent with the payment/create method. In the example, the parameter is MYPARAM.
It is possible to write custom parameters within the customInfo field, in the key / value syntax.
1{
2  "customInfo":{
3    "{myCustomInfo1}":"{myCustomInfoValue1}",
4    "{myCustomInfo2}":"{myCustomInfoValue2}"
5  }
6}
You can recall the parameters with the call payment / details and are also included in the result of payment / submit
. For more information on customInfo, access the API documentation
.