

 Amazon Pay
Amazon Pay is a service that lets your customers use the payment methods already associated with their Amazon account to pay for goods and services. To perform a payment, users can use any of the payment methods registered in their Amazon account.
Summary
In order to integrate Amazon Pay you need to follow these operations:
Setup the account:
Sign in on Amazon Pay Seller Central
Configure Amazon Pay
Generate a MWS Token
Use your Amazon Pay credentials to set up your Fabrick account, first in sandbox and then in production
Integrate Amazon Pay button in the list of the available payment methods on your website.
Execute the payment:
Execute the data encryption
Redirect the user to the payment page
Read the result and decrypt the response
If you’re using Amazon Pay with the shipping address selection mode, you have to read the shipping and billing address by calling CallReadTrxS2S.
Account setup
Sign in on Amazon Pay Seller Central
To use Amazon Pay you must register and follow the instructions.
Configure Amazon Pay
To communicate with Fabrick Payment Orchestra sandbox and production environments, you need to access this page https://sellercentral-europe.amazon.com/external-payments/amazon-pay/integration-central/lwa and follow these instructions:
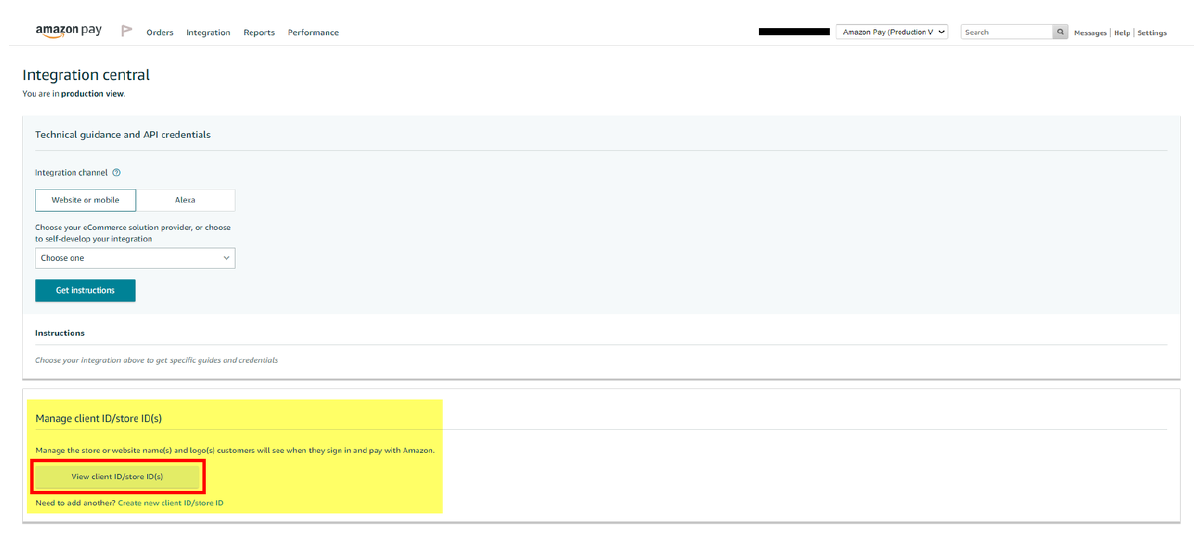
From the Seller Central home page, in production or sandbox view, select “Integration - Integration Central” from the navigation bar on top-left side.


2. From Integration Central page, scroll down to the “Manage client ID/store ID(s)” section, and click “View client ID/store ID(s)”.


3. If you have an existing Client or Store ID registered yet, review the configuration of the selected store. You can click on the “Edit” link on the right side to edit information.


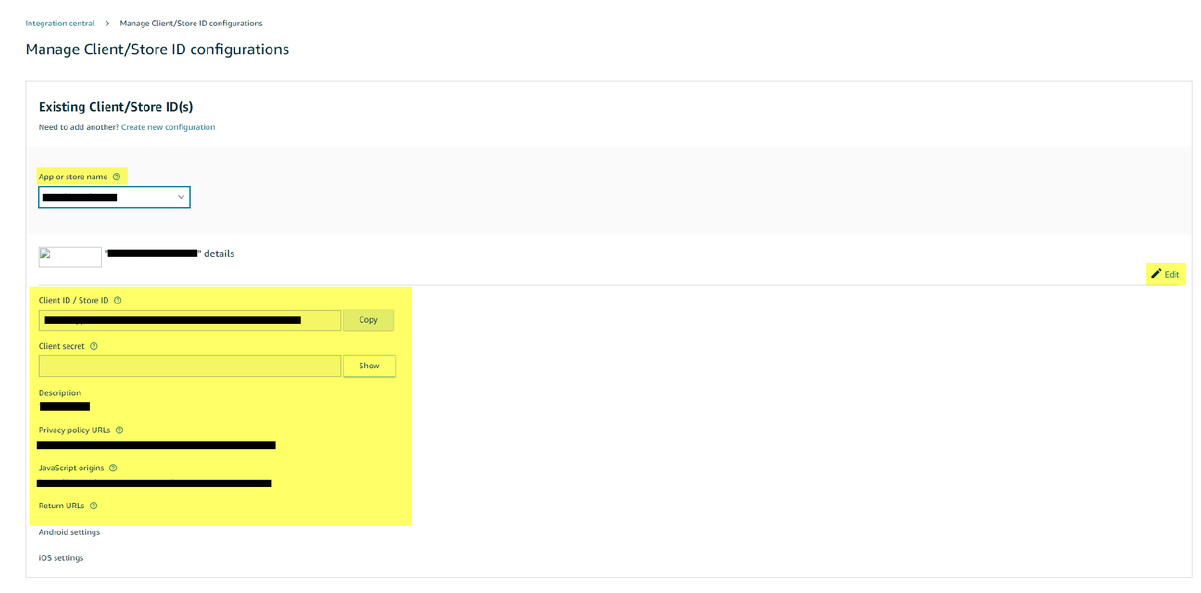
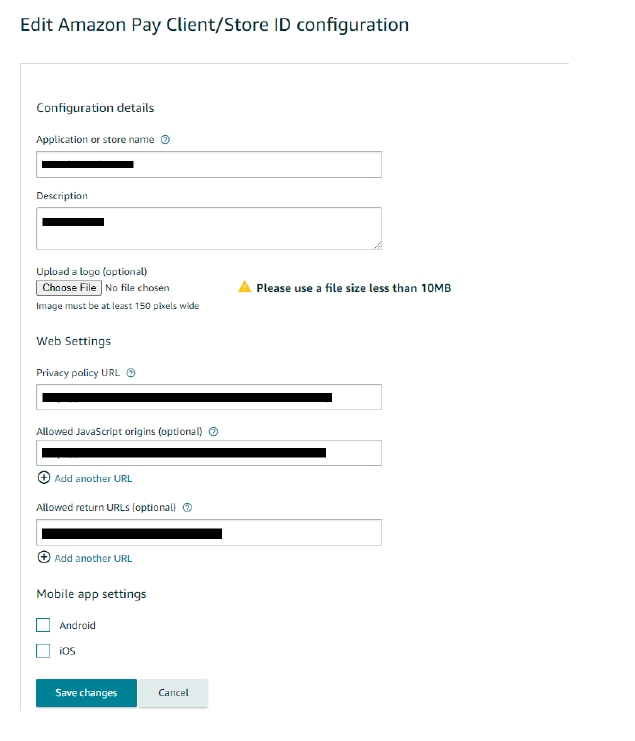
4. f you click on the �“Edit” button, you can edit all the client details.


5. From step 3, by clicking on the “Create new configuration” link on top, you will be able to create a new client configuration providing all the relevant information.


Allowed Javascript Origins
https://sandbox.gestpay.net
Allowed Return URLs
https://sandbox.gestpay.net/pagam/AmazonPay.aspx
Allowed Return URLs Mobile
https://sandbox.gestpay.net/pagam/Mobile/AmazonPay.aspx
IPN Notification Urls
https://sandbox.gestpay.net/pagam/AmazonPayNotification.aspx
Allowed Javascript Origins
https://ecomm.sella.it
Allowed Return URLs
https://ecomm.sella.it/pagam/AmazonPay.aspx
Allowed Return URLs Mobile
https://ecomm.sella.it/pagam/Mobile/AmazonPay.aspx
IPN Notification Urls
https://ecomm.sella.it/pagam/AmazonPayNotification.aspx
Generate MWS Token
The MWS Token is needed to delegate Fabrick Payment Orchestra to operate on your behalf.
In order to generate the MWS Token:
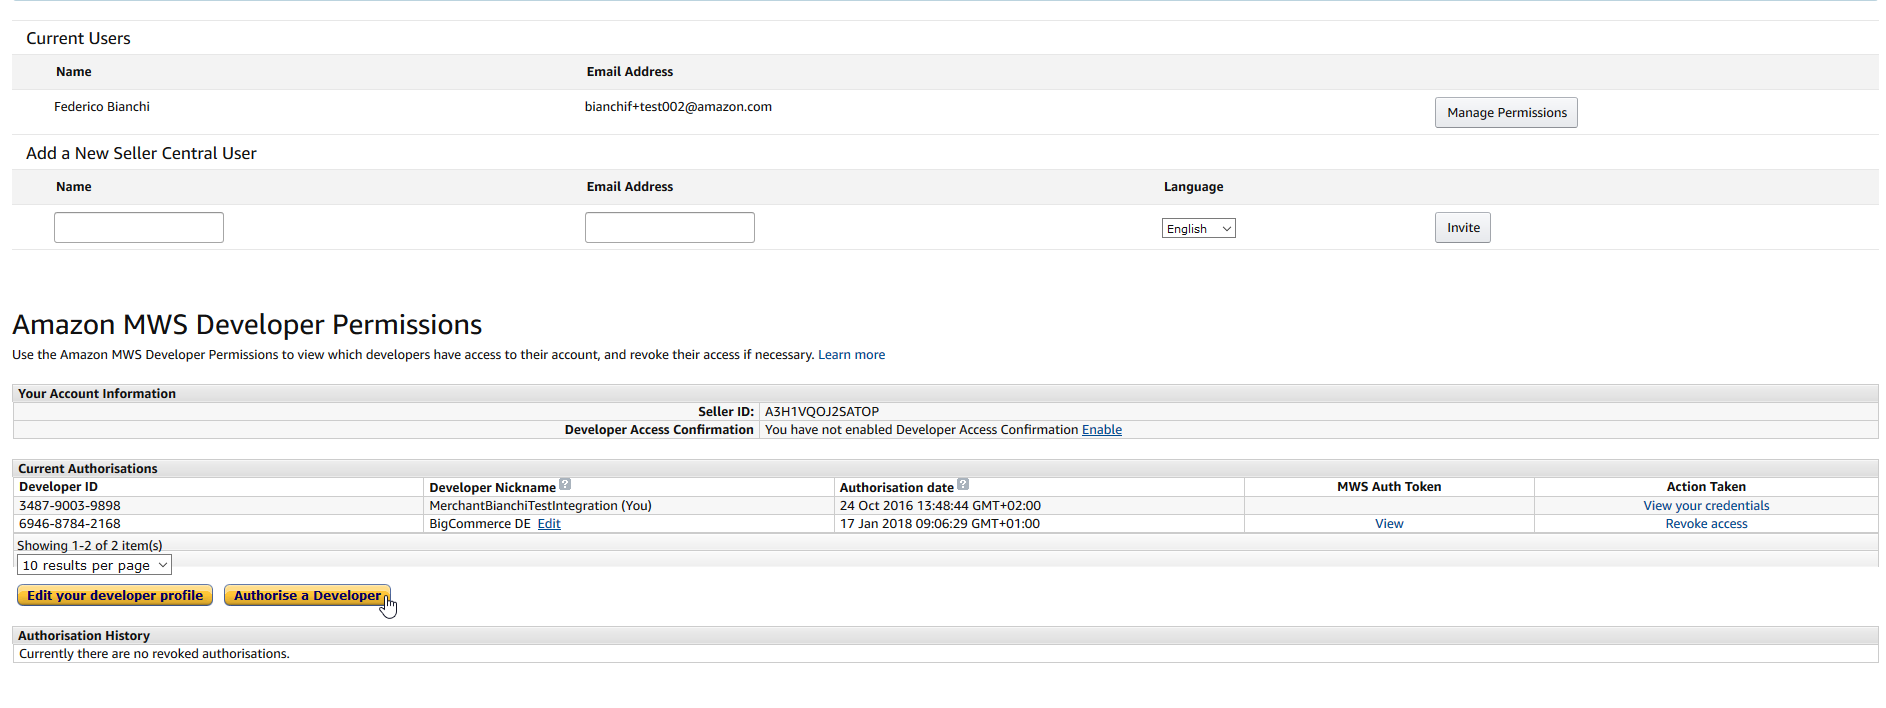
On your seller account dashboard, click on the Settings menu and then on User Permissions.


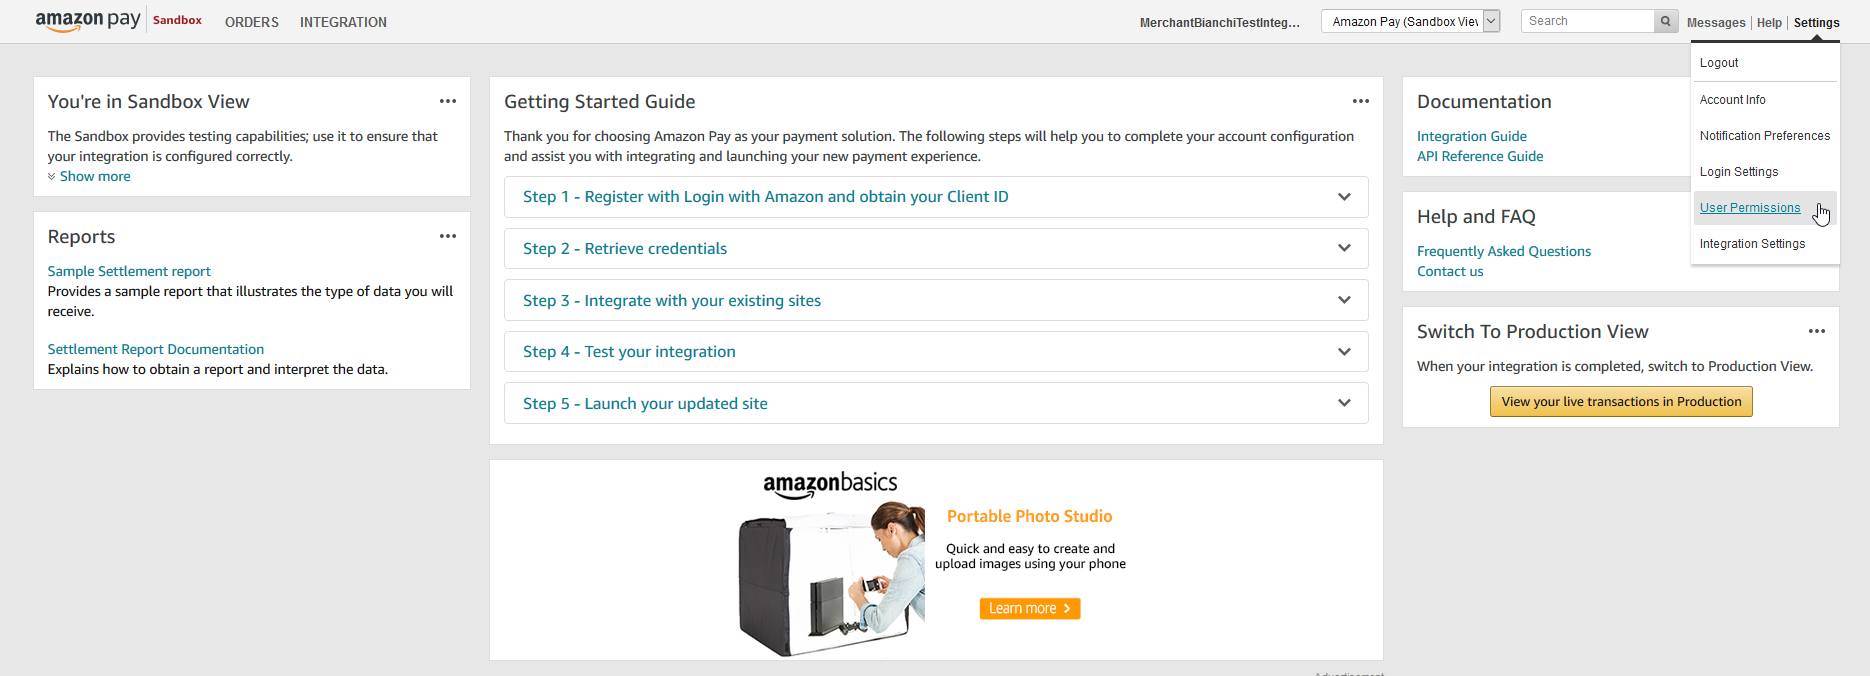
On this page you’ll see all MWS developer permissions. Click on Authorise a Developer button to generate a new one:


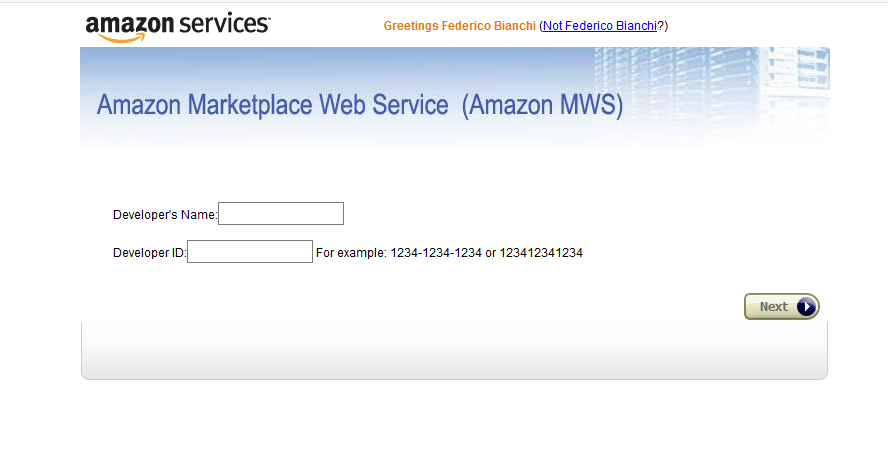
In the next window, set this data:
Developer’s Name
Gestpay
Developer ID
5535-2867-1582


Once you’ve saved the developer information in Amazon, you’ll see the MWS token in the table “Amazon MWS Developer Permissions” on the previous page (see step 2).
Fabrick Payment Orchestra configuration
In the Fabrick Back Office, you can insert the Amazon Pay credentials received when signed in:


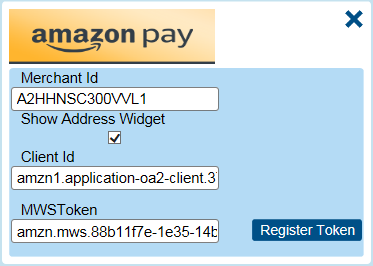
The Show Address Widget checkbox allows the selection of the address from Amazon Pay during the payment by showing the widget. This setting can be disabled if the merchant sells non-shippable items (e.g. non physical goods).
Amazon Pay payment flow with the Payment Page
In order to use Amazon Pay:
start the payment process by calling Encrypt with mandatory data.
redirect the user to the payment page, passing the CryptDecryptString received in response.
Fabrick Payment Orchestra will call the merchant’ Positive (or Negative) Response URL to acknowledge the status of the transaction; Fabrick Payment Orchestra will also call the merchant’ Server-to-Server URL. The merchant has to decrypt the parameters and read the transaction status.
To retrieve the buyer’s address, you have to call callReadTrxS2S
 .
.
1. Encrypt
The first step is to encrypt the payment request and send it to Fabrick Payment Orchestra. To do this, you’ll call Encrypt in WsCryptDecrypt webservice.
An Encrypt example is available in our API section.
If you want to use the paymentType tag for this method, the value to use is AMAZONPAY. See the section Standard Payment Page to learn how to use the paymentType tag.
With Amazon Pay the ShopTransactionId must be unique.
ShopTransactionId can contains only the following characters:
lowercase a-z
uppercase A-Z
numbers 0-9
dash (-)
underscore (_)
Maximum: 32 characters
2. Redirect the user
Fabrick Payment Orchestra will answer to your request with an EncryptResponse, that will contain a field CryptDecryptString.
For test environment, redirect the user to http://sandbox.gestpay.net/pagam/pagam.aspx?a=<ShopLogin>&b=<CryptDecryptString>
For production environment, the url is http://ecomm.sella.it/pagam/pagam.aspx?a=<ShopLogin>&b=<CryptDecryptString>
More info on this can be found in Using Fabrick payment page.
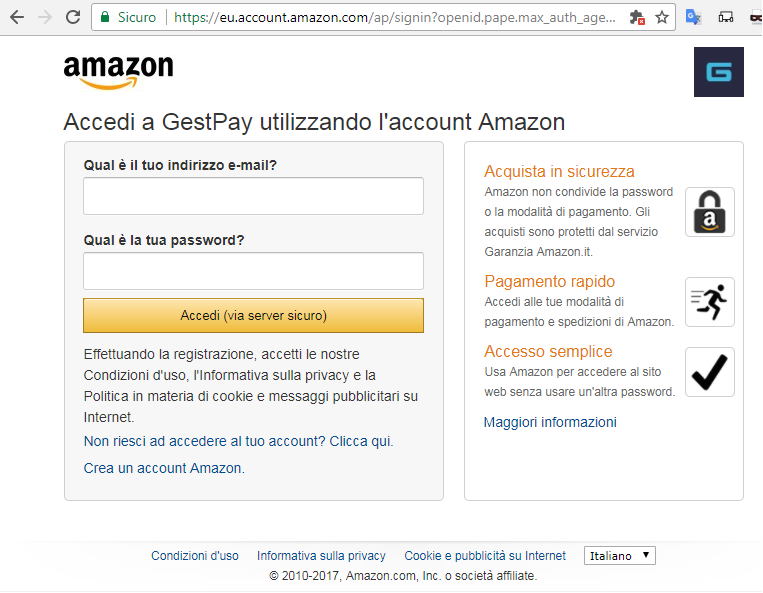
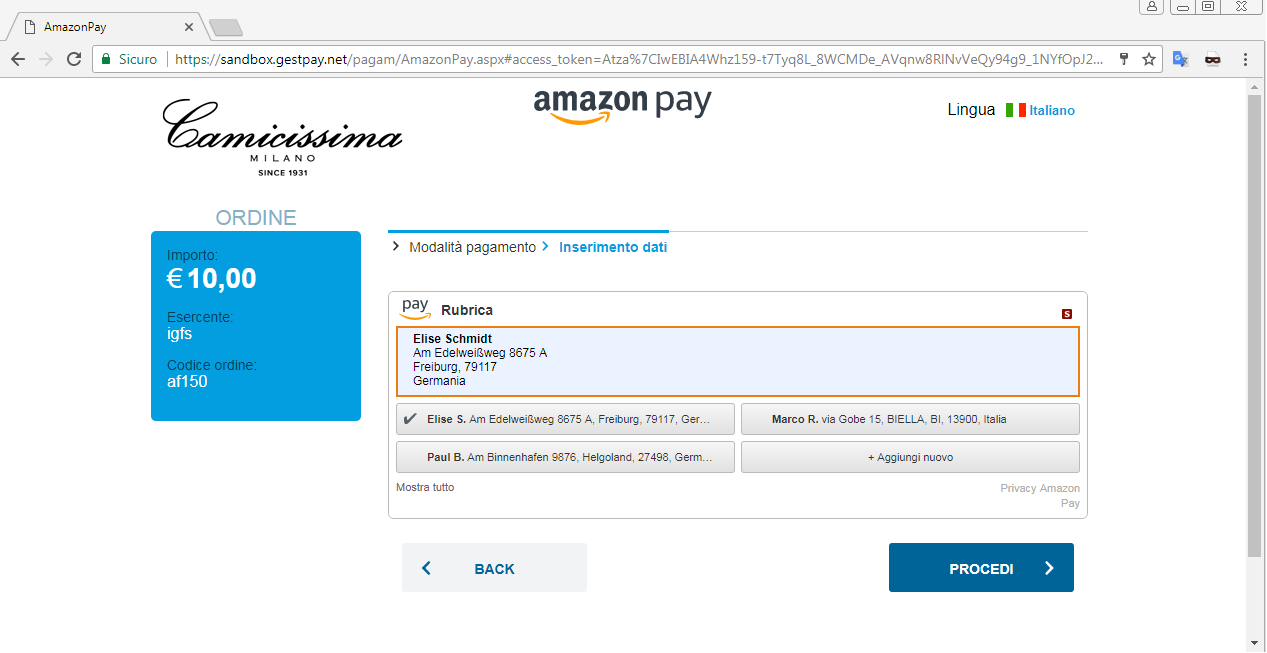
Once the buyer is redirected, and if he is not authenticated, Amazon will show a login form:


Once the buyer is logged, they will be shown a page where they can choose the shipping address from Amazon saved addresses:


Then they can choose a credit card amongst the saved amazon credit cards.


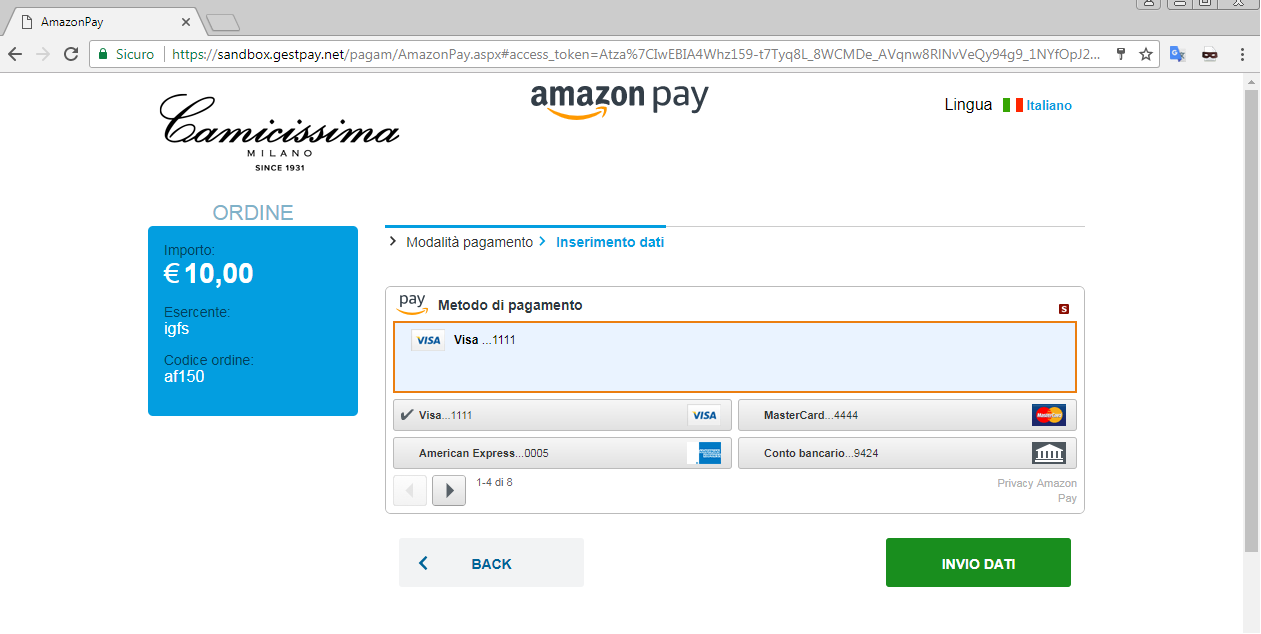
At the end, Fabrick Payment Orchestra will perform an authorization request on the selected credit card, and the buyer will be redirected to the merchant website (positive or negative response URL).
3. Read response from Fabrick Payment Orchestra
After the payment has been acknowledged, Fabrick Payment Orchestra will:
redirect the user to the URL specified in URL for positive (or negative) response;
asynchronously call the URL Server to Server with the transaction data.
This process is described in the docs page about the standard payment page.
The payload of this call are two query parameters, the first being the shopLogin and the second being a encrypted string.
To decrypt the encrypted string you must call Decrypt in WsCryptDecrypt webservice; in the response you’ll see the transaction result.
4. Get the buyer’ shipping and billing address
To retrieve the buyer’s shipping addresses, you call callReadTrxS2S in WsS2S webservice. There, you’ll find also a response example.
The relevant data is contained in the OrderReferenceDetails tag; here we’ll report an example of the response relevant data:
1<callReadTrxS2SResponse xmlns="https://ecomms2s.sella.it/">
2  <callReadTrxS2SResult>
3    <GestPayS2S xmlns="">
4      ...
5      <OrderReferenceDetails>
6        <OrderReferenceStatus>
7          <State>Draft</State>
8        </OrderReferenceStatus>
9        <OrderLanguage>it-IT</OrderLanguage>
10        <Destination>
11          <DestinationType>Physical</DestinationType>
12          <PhysicalDestination>
13          <StateOrRegion>BI</StateOrRegion>
14          <Phone>33333333</Phone>
15          <City>BIELLA</City>
16          <CountryCode>IT</CountryCode>
17          <PostalCode>13900</PostalCode>
18          <Name>Marco Rossi</Name>
19          <AddressLine1>via Gobe 15</AddressLine1>
20          </PhysicalDestination>
21        </Destination>
22        <ExpirationTimestamp>2018-05-13T07:24:02.186Z</ExpirationTimestamp>
23        <IdList/>
24        <SellerOrderAttributes>
25          <SellerOrderId>4354395804398dkfjlhsdfk</SellerOrderId>
26        </SellerOrderAttributes>
27        <OrderTotal>
28          <CurrencyCode>EUR</CurrencyCode>
29          <Amount>10.00</Amount>
30        </OrderTotal>
31        <Buyer>
32          <Name>Ale</Name>
33          <Email>marco.rossi@email.it</Email>
34        </Buyer>
35        <ReleaseEnvironment>Sandbox</ReleaseEnvironment>
36        <AmazonOrderReferenceId>S02-0319513-4657042</AmazonOrderReferenceId>
37        <CreationTimestamp>2017-11-14T07:24:02.186Z</CreationTimestamp>
38        <BillingAddress>
39          <PhysicalAddress>
40          <City>Neunkirchen</City>
41          <CountryCode>DE</CountryCode>
42          <PostalCode>66538</PostalCode>
43          <Name>Liam Barker</Name>
44          <AddressLine1/>
45          <AddressLine2>Meininger Strasse 58</AddressLine2>
46          </PhysicalAddress>
47          <AddressType>Physical</AddressType>
48        </BillingAddress>
49        <RequestPaymentAuthorization>false</RequestPaymentAuthorization>
50      </OrderReferenceDetails>
51      ...
52    </GestPayS2S>
53  </callReadTrxS2SResult>
54</callReadTrxS2SResponse>
If you want to implement your custom payment page by loading AmazonPay widgets, you can call Fabrick Payment Orchestra callPagamS2S (the webservice that allows to pay via server-to-server) with this data:
paymentType
AMAZONPAY
transKey
the Amazon Order Reference Id field received by Amazon
An example call can be found in the API.
Multiple captures on payments via AmazonPay are currently not supported in Fabrick Payment Orchestra.
Recurring payments via Amazon Pay
With Amazon Pay you can set up recurrent payments. To do this, in the Encrypt method you can use the option amazonPayBillingAgreementDescription:
1<Encrypt>
2  <shopLogin>9000001</shopLogin>
3  <uicCode>242</uicCode>
4  <amount>100</amount>
5  <shopTransactionId>34az85ord20</shopTransactionId>
6  <paymentTypes>
7    <paymentType>AMAZONPAY</paymentType>
8  </paymentTypes>
9
10  <!-- use this tag for recurring payments -->
11  <amazonPayBillingAgreementDescription>
12    paynowandrecurring
13  </amazonPayBillingAgreementDescription>
14  ...
15</Encrypt>
Possible values for amazonPayBillingAgreementDescription:
Empty – no token is returned.
paynowandrecurring – a payment is performed instantly and a token is generated for subsequent payments.
onlyrecurring – only a token is returned.
An example can be found in the API docs.
To use the token for repeated payments, see CallPagamS2S.