
 Magento 2

Detailed feature descriptions:
Quick and easy setup mode
Wide availability of alternative payments
Creation of Banca Sella's standard payment page
Management of orders and invoices via server-to-server calls (orders, cancellations, pre-authorizations)
Management of fast payments thanks to card tokenization (one-click mode)
Management of fast payments via the form designed on the Magento check-out page
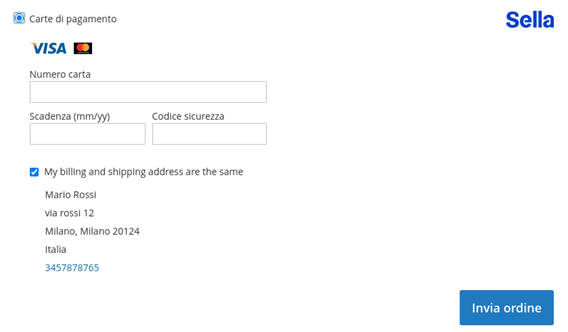
Management of orders and invoices via server-to-server calls (orders, cancellations, accounting);
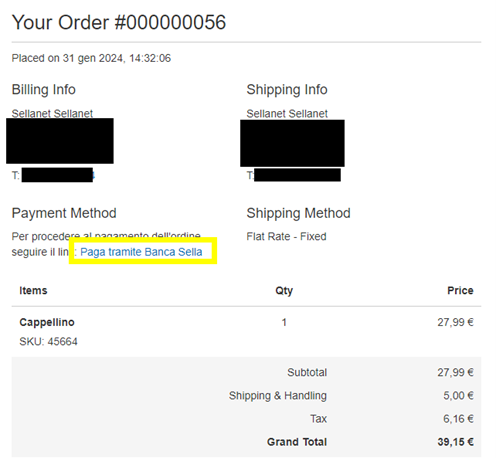
Pay By Link: you can generate an order from the Magento backend, sending the customer an email with the link to complete the payment (not all alternative methods are supported)
E-mail example
Merchant back-office configuration
In the merchant back-office, credentials and SHOP Login and API Keys can be recovered, to then be reused to configure the plugin in the Magento back-office.
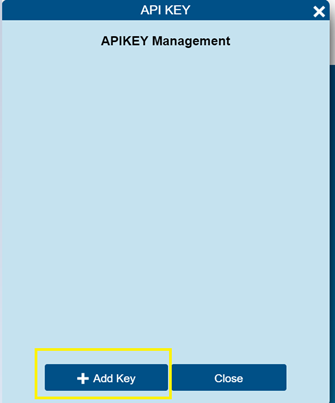
Within Configuration > Security > APIKEY ,you can create the required value.

by clicking on the Add Key button
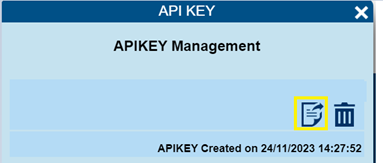
Click on the Copy button, highlighted in the image, to copy the key to the clipboard, and then be able to use it on the Magento backend.
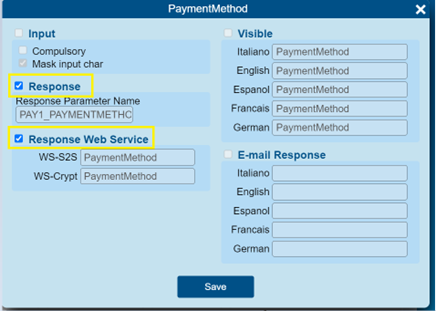
Within the Payment Page > Fields and Parameters please enable the PaymentMethod parameter in response, on both pages
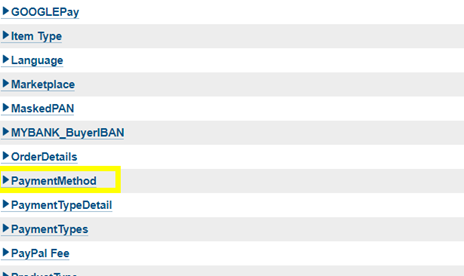
and tick the two boxes as shown in the below image.
Installation
You can install the plugin by:
Downloading the latest available version of the plugin on the Magento marketplace, at this link
.
Composer, Adobe's official method for installing modules.
From the Adobe Commerce site, add the "Ecommerce Sella" module
to the cart and finalise the free purchase.
Run the command composer require easynolo/ecommercesella
Plugin configuration
Note: To use the plugin's features, you must request Sella support to enable the following features on the merchant code:
iFrame
S2S API (Authorization, Transaction Management, Refund, Inquiry)
After installing the plugin, you need to configure the options that are made available via the Magento back office.
In the dedicated section Shops/ Configuration/ Sales/ Payment methods you can find the Sella block for configuring the plugin.

In the first section you can configure the following:
Plugin: allows the methods made available by Sella to be displayed during the checkout phase;
Enabling test mode: allows you to use the payment gateway sandbox via the relevant SHOP Login and test API Key;
Wallet&Click2Pay: enables access to Apple Pay, Google Pay and payment card services on the new Fabrick Payment page;
Card tokenization: allows the customer's payment card to be saved securely and then proposed in subsequent payments;
Type of payment card operation: identifies the accounting method: if entered with "Authorization and accounting", the transaction, if authorized, is also independently accounted for; while if valued with "Authorization", the transaction, if authorized, requires a manual operation to be accounted for.
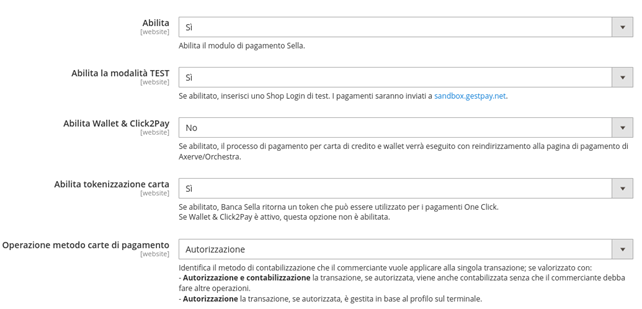
If you wish to use the Wallet & Click2Pay functionality with Fabrick Payment, you need to configure the URLs for positive, negative and server-to-server responses in the merchant back office as follows:
positive response: {domain}/sella/back/success/
negative response: {domain}/sella/back/failed/
Server to Server: {domain}/sella/back/walletclick2paypost/
In order to enabling the Wallet & Click2Pay functionality the GooglePay section must be set as NO , as shown in the section below.
Furthermore, you can configure the visibility of individual payment methods and, whether necessary, hide them.
Payment method configuration
In the first section, there are three subsections to manage extra configurations on specific payment methods:
Consel, in which, by enabling the method, it is necessary to specify the Merchant Promotional Code;
Google Pay, where, by enabling the method, it is necessary to specify the merchant ID;
PayPal, for which it is possible to choose the type of operation: authorisation and accounting or authorisation.
In the second section there are two specific fields for entering the SHOP Login and API Key credentials.

When saving the configuration, the credentials entered are validated. If valid, the plugin will synchronize all the active payment methods for them to be available during the check-out phase for the end customer.
The payment methods are updated on the merchant back-office, and the list is periodically synchronized by a Magento procedure.
If the merchant wants to synchronize the payment methods immediately, it will be necessary to save the plugin configuration on Magento again.
If the Wallet&Click2Pay mode is enabled, it will not be necessary to specify the parameters for Google Pay as this method will be managed via Fabrick Payment, and the parameters will be specified within the back-office.
Information for managing token saved card (frontend)
If on backend the option for tokenizing the credit card is enabled, the buyer has the possibility to choose to save the credit card as a token.
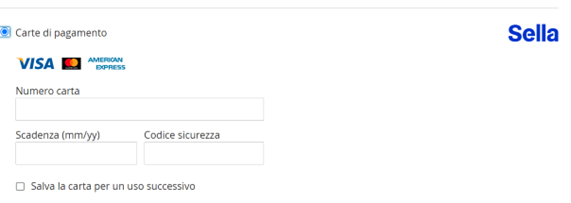
Once saved, when the buyer will do a new order, he will see as preferred payment method the previously saved token. He can still choose another payment method or to use a different credit card.
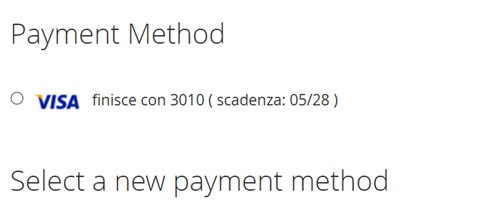
Later, on his profile, the buyer has the new section “Stored Payment Methods”, ad there he can manage the saved token, with the possibility to delete them

Information for managing orders and transactions
Authorization request
With the M.O.T.O. configuration, Fabrick allows you to separate the authorization and managing phases. If activated, the first transaction is limited to the authorization request, otherwise Fabrick moves the amount immediately after authorization.
The plugin works according to the configuration chosen and described in the Plugin Configuration paragraph.
Capture
With the movement operation, the authorized total is permanently transferred to the merchant's current account. To use it, you need to configure the M.O.T.O. function. so that it is separate from the authorization.
With this configuration Magento creates an order and during the payment phase the amount is bound thanks to the authorization operation (the merchant receives an e-mail from Fabrick).
When the invoice is requested, Magento requests the authorized sum to be moved to Fabrick which takes care of it and sends an e-mail to the merchant.
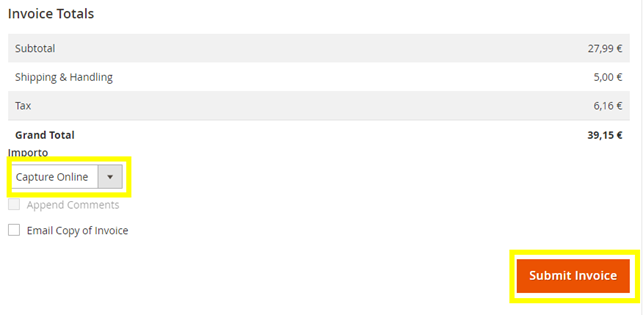
The operation can be carried out via the Magento backend (from Sales > Orders), selecting the interested order, clicking on View and then Invoice in the top right panel.

In the open window, select Capture Online and then Submit Invoice.
Cancellation
Cancellation can be requested for an authorized but not yet processed transaction and the M.O.T.O. function must be set with the separation between authorization and movement. The operation can be carried out via the Magento backend (from Sales > Orders), selecting the interested order, clicking on View and then Cancel in the top right panel.

Refund
Refunds can only be requested on payments that have already been processed. From a tax point of view it involves a debit from the merchant and a credit to the buyer's card.
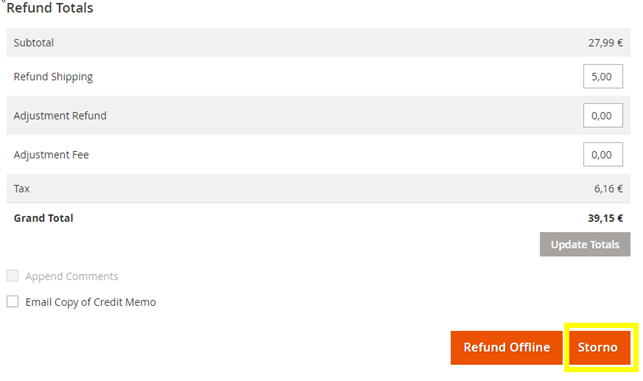
A transaction can be fully or partially refunded multiple times, up to the full payment. On Magento, a refund is made via the backend (from Sales > Orders), by selecting the Order and clicking on View. From the Invoices Menu, select the invoices linked to the order, then select Credit Memo.

Select the quantity of the products to be refunded.

And then, after having adjusted eventually other refund options, like the shipping fees, press “Storno”, like in the below image.
MOTO Management
Based on the configuration in the plugin or in Fabrick's merchant back office, there are three possible scenarios:
If Fabrick is set to capture the transaction, MOTO must be set to contextual in Fabrick’s merchant back office. On Magento, the action to be set is Authorization. The Capture via the Magento order page can only be offline (for invoice generation only).
If Magento is set to capture the transaction, MOTO must be set to separate in Fabrick. After this, there are two options:
On Magento, the action to be set is Authorization if a manual Capture via the Magento order page is required. The Capture via the Magento order page can be offline (for invoice generation only, without financially capturing the transaction). In this case, financial settlement must be managed via the Fabrick dashboard. It can be online (to generate the invoice and financially capture the transaction).
On Magento, the action to be set is Authorization and Settlement if Magento is to immediately capture the transaction financially and generate the invoice. In this case, the Capture via the Magento order page should not be managed, as the transaction is already captured and the invoice is generated.
LOG files
The logs of the operations carried out are available in the “debug.log” file in the path “/var/log”
CRON Job
By leveraging the existing CRON Job in Magento, the Ecommerce Sella plugin can:
Manage the Waiting(XX) status returned by certain payment methods that do not immediately provide an OK or KO upon order confirmation.
Handle the pending status of Riskified, which, in some cases, does not immediately approve or reject the transaction but requires more time for fraud analysis.